Another Revisit: Flower Garden

This week I pulled out Flower Garden, an early Papertrey Ink stamp set. In my Evernote inventory, I had noted that I hadn’t used it very much, which is usually a sign that a set might be headed toward the donation pile.

When Flower Garden was first released, the sample cards leaned heavily into repeating patterns and fuller backgrounds. The designs were cheerful and decorative, with lots of layered elements and sentiment labels.

Instead of trying to recreate that original style, I simply started experimenting.

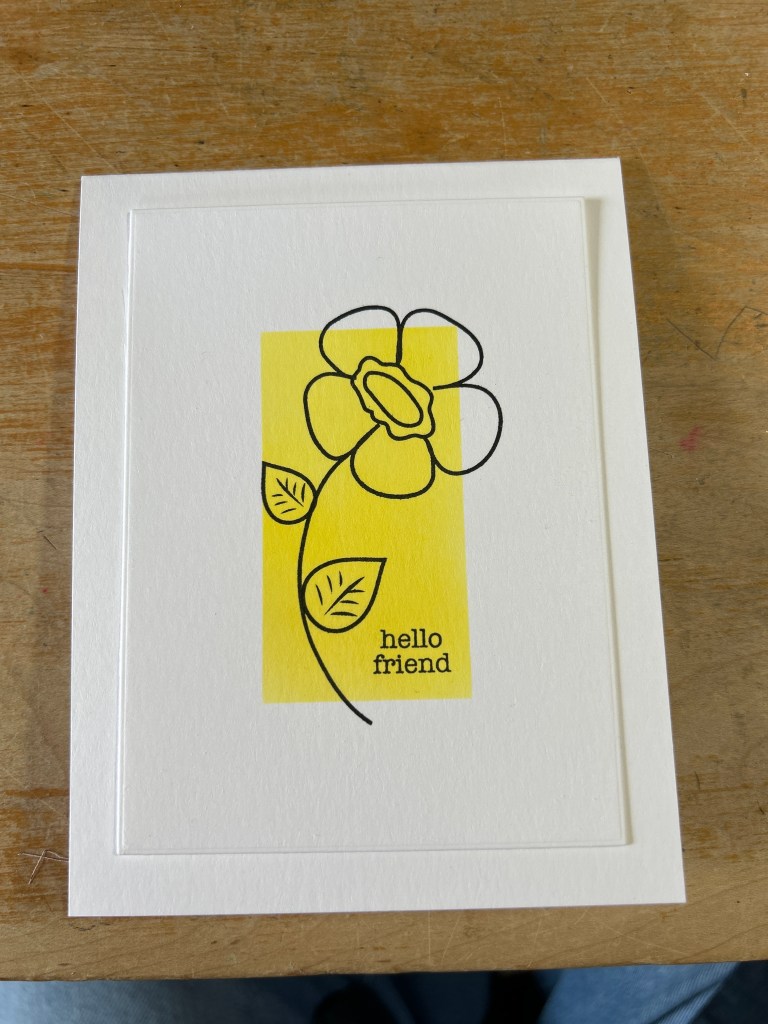
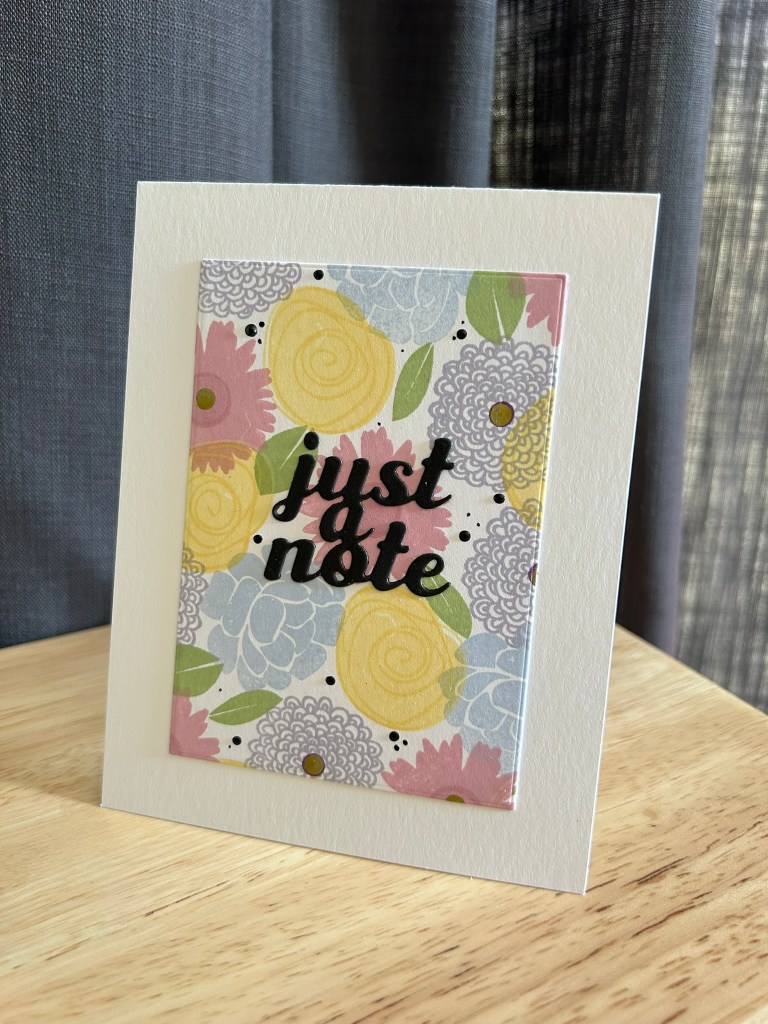
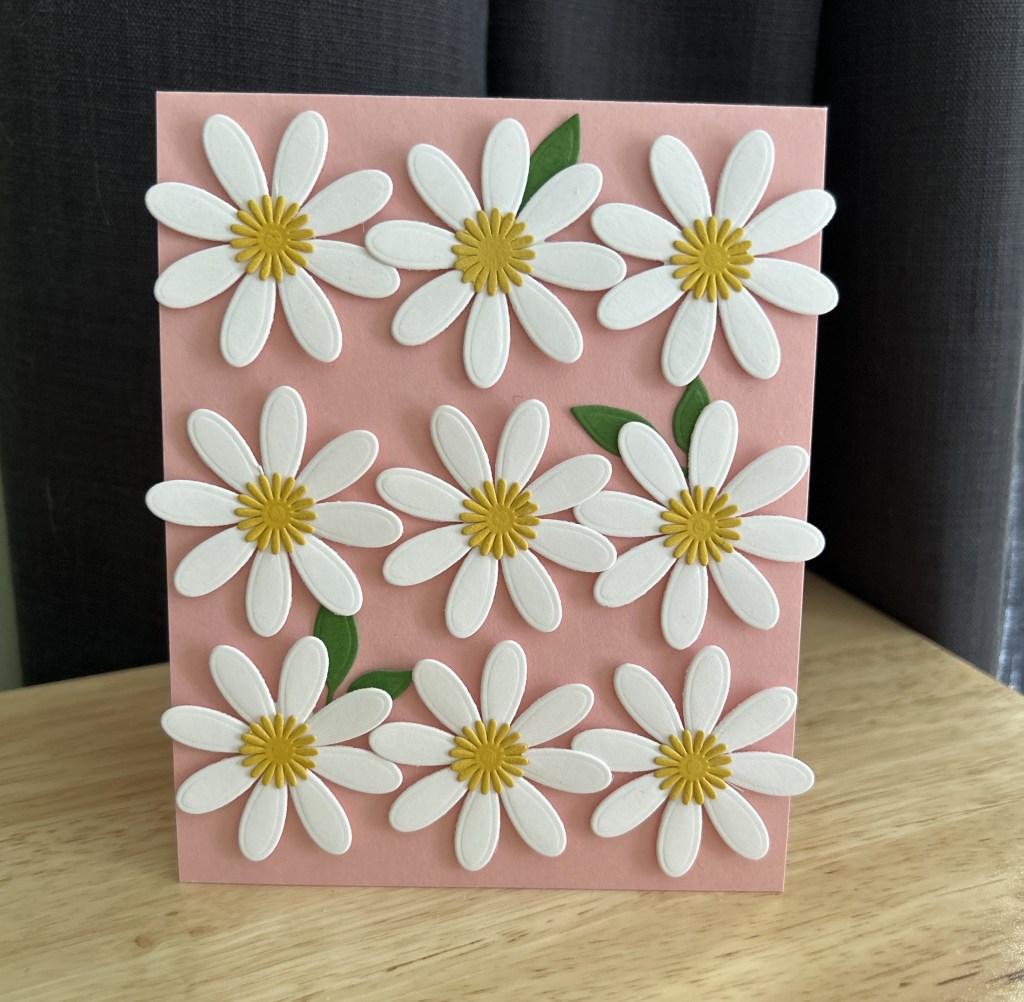
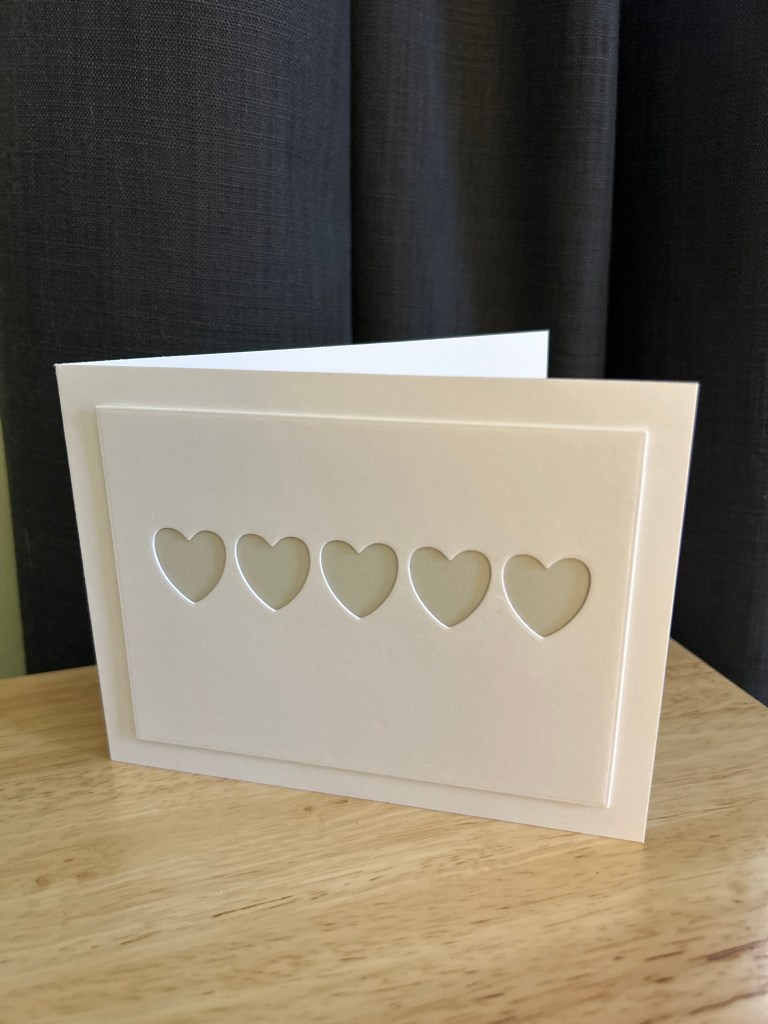
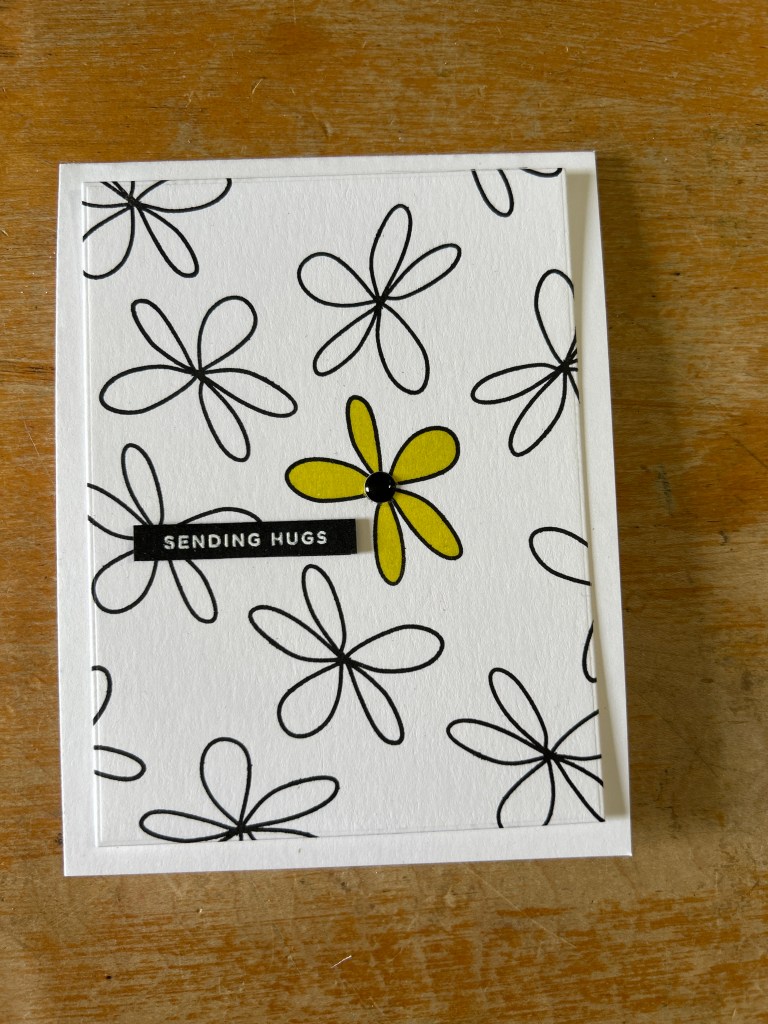
For the first card, I masked off a section of the card and blended a bright yellow. Then I stamped the flower outline across the panel to create a simple black pattern.

Keeping the rest of the panel mostly black and white helped that single flower become the focal point. A small sentiment strip finished the design without competing with the pattern.

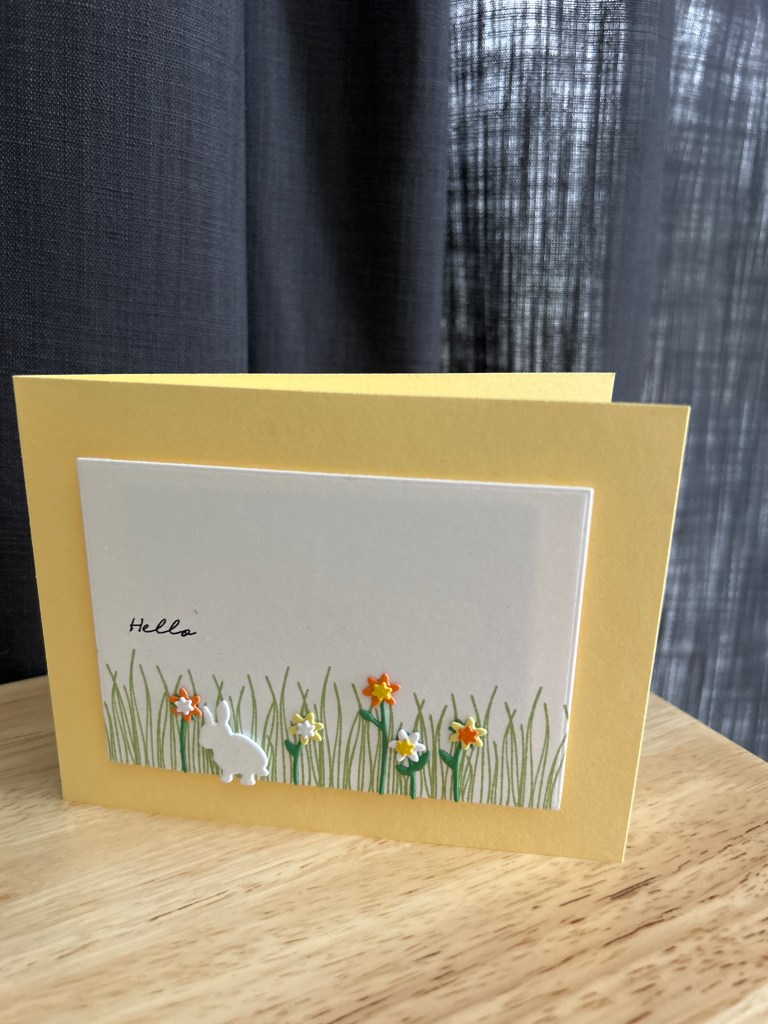
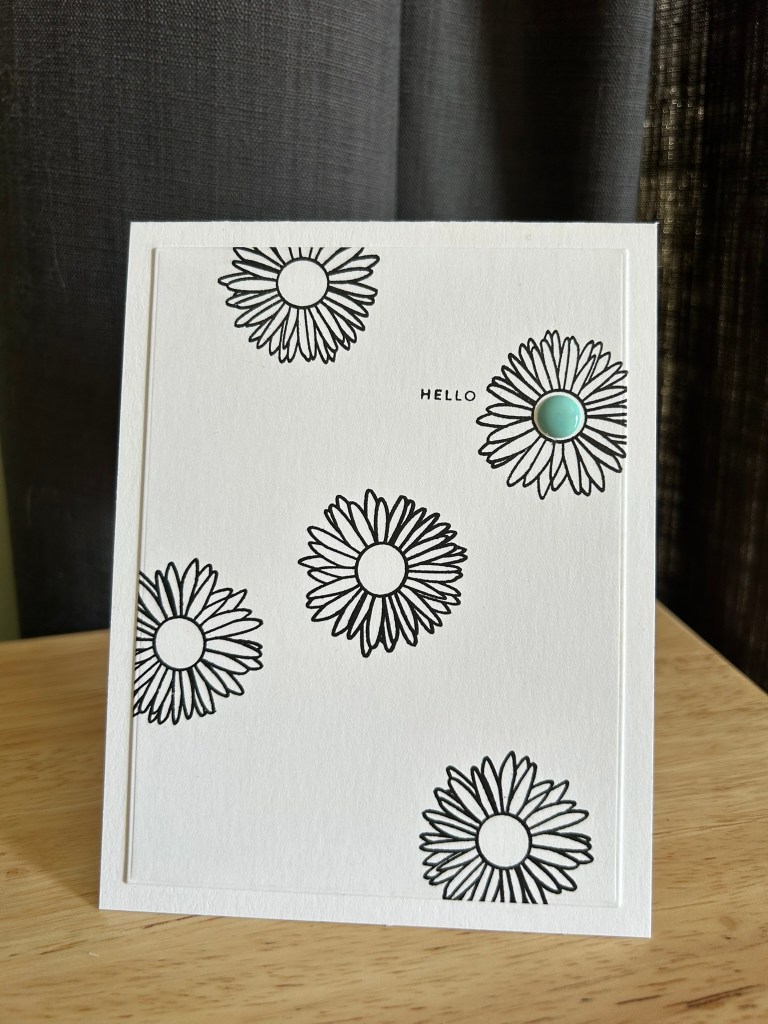
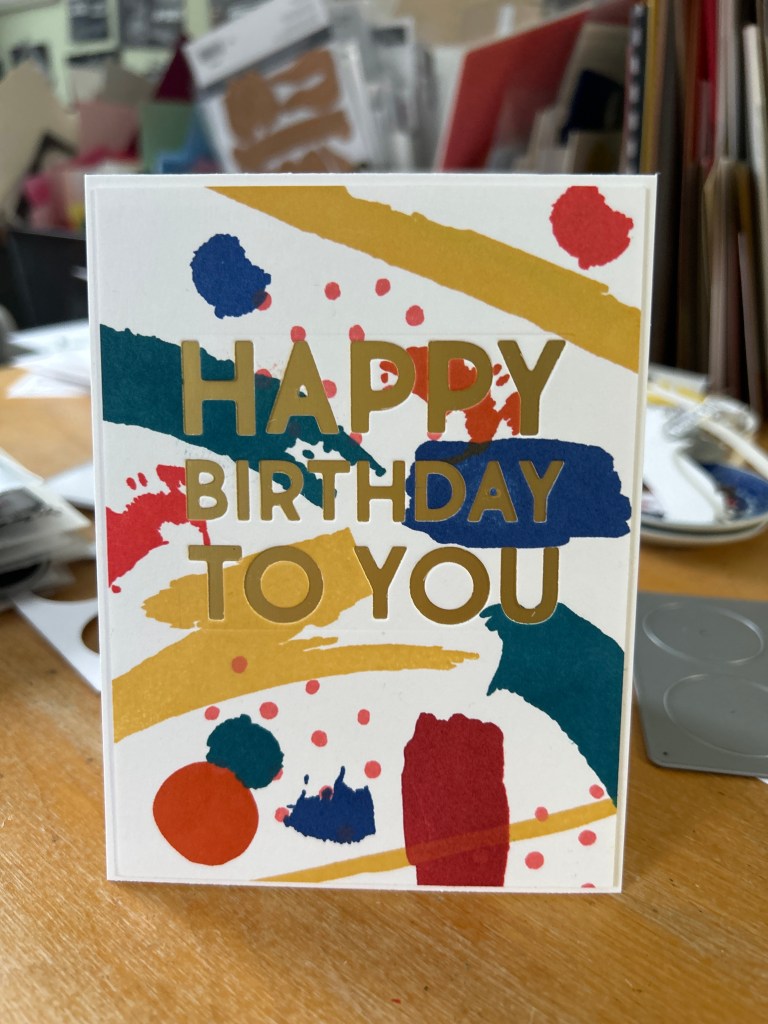
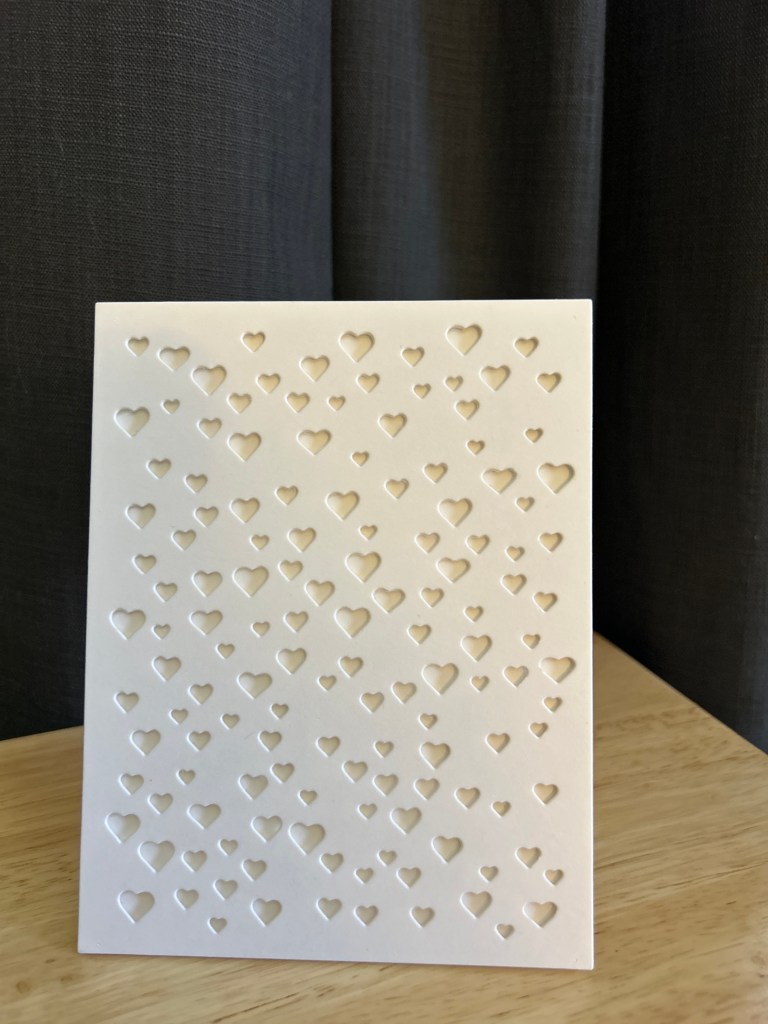
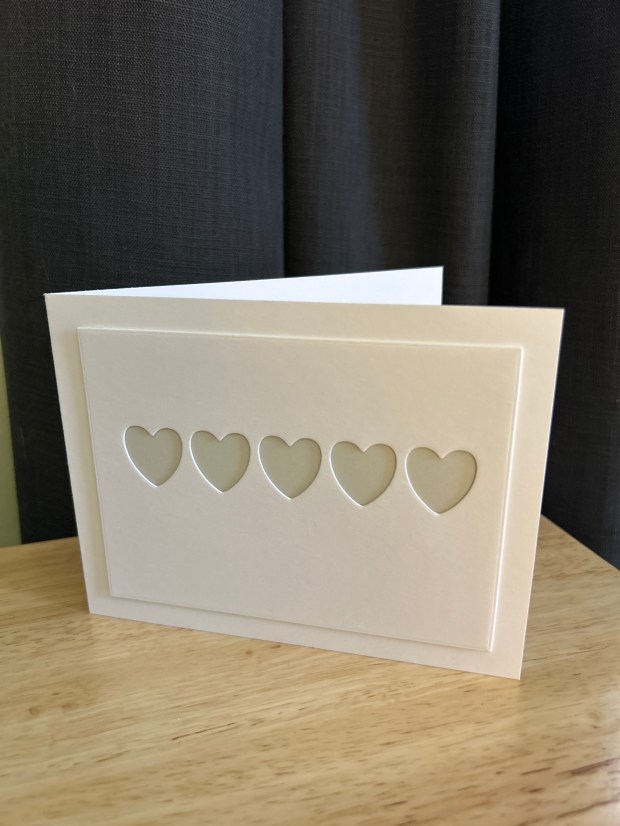
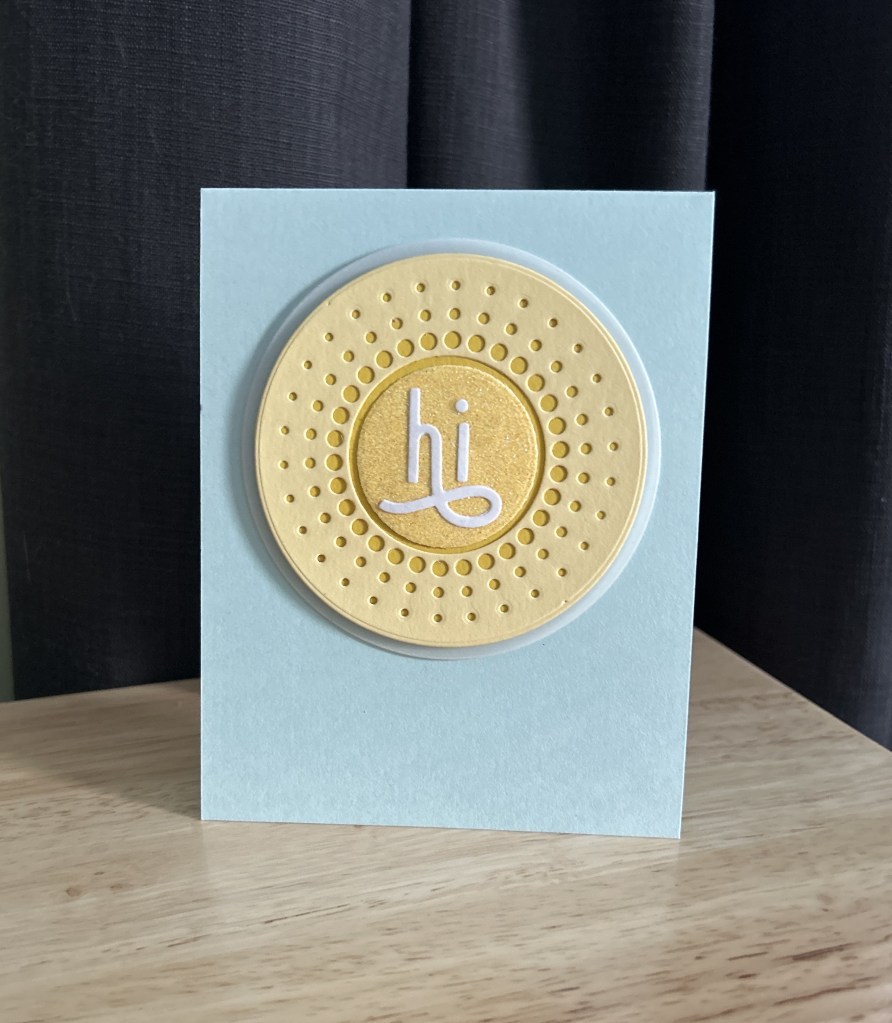
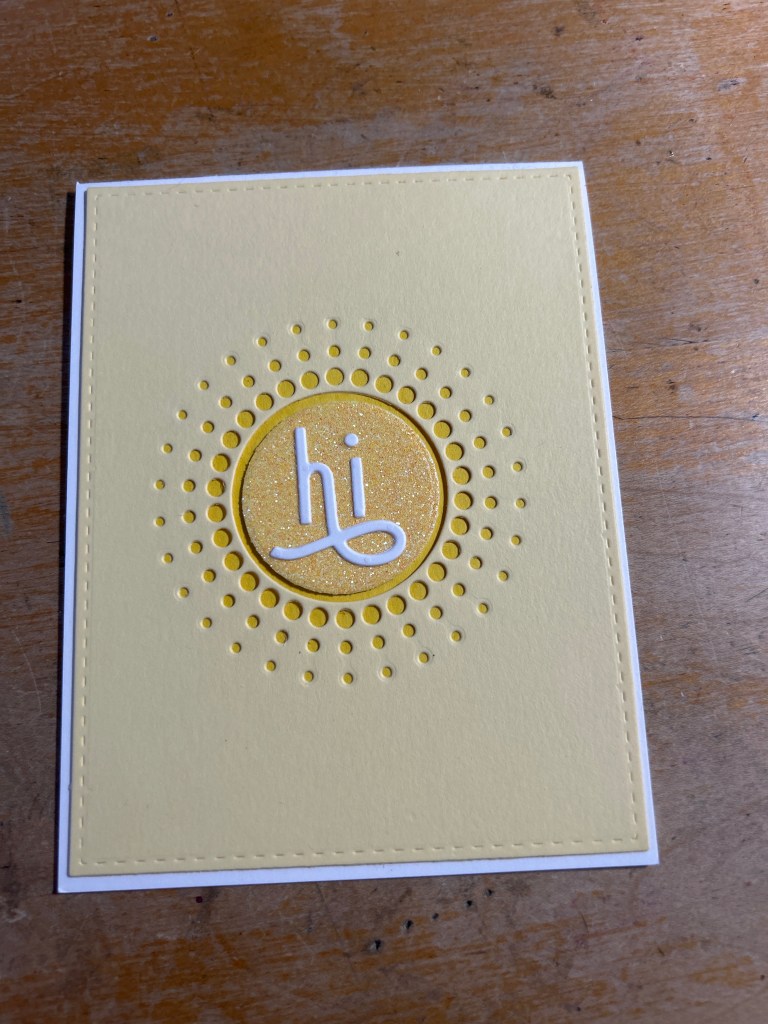
Keeping the graphic vibe going, I stamped a single flower to create a background. The design relies on white space and a limited palette rather than a busy pattern.

This approach gave the stamp set a surprisingly modern look and showed how well the line art works when it has room to breathe.

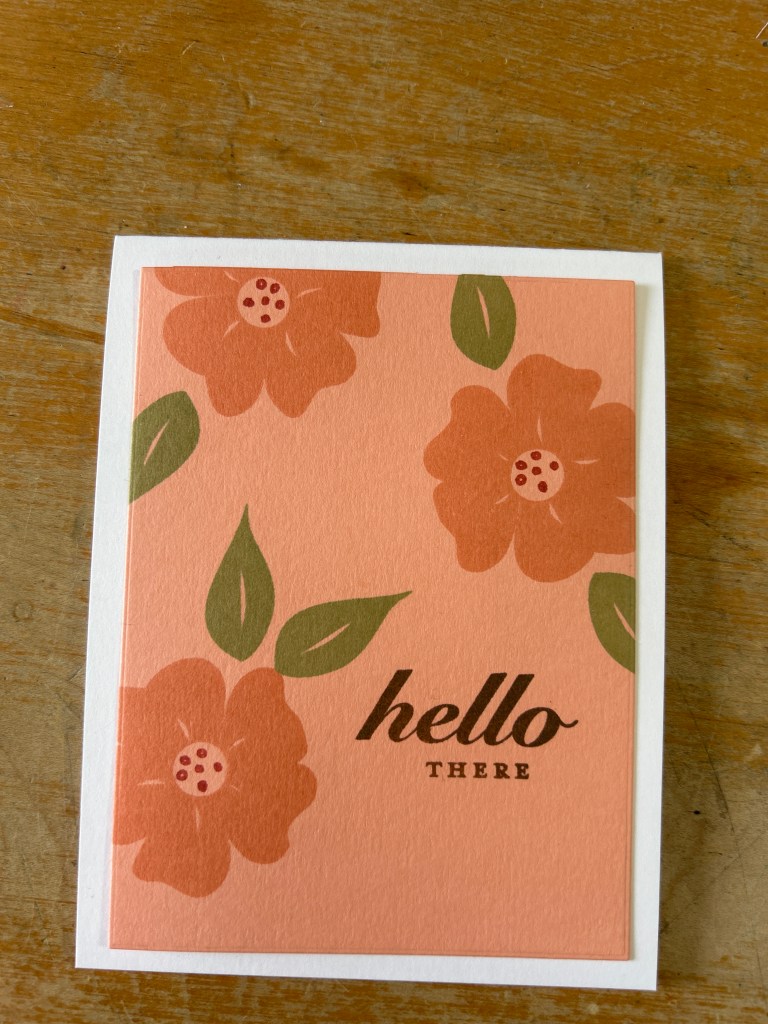
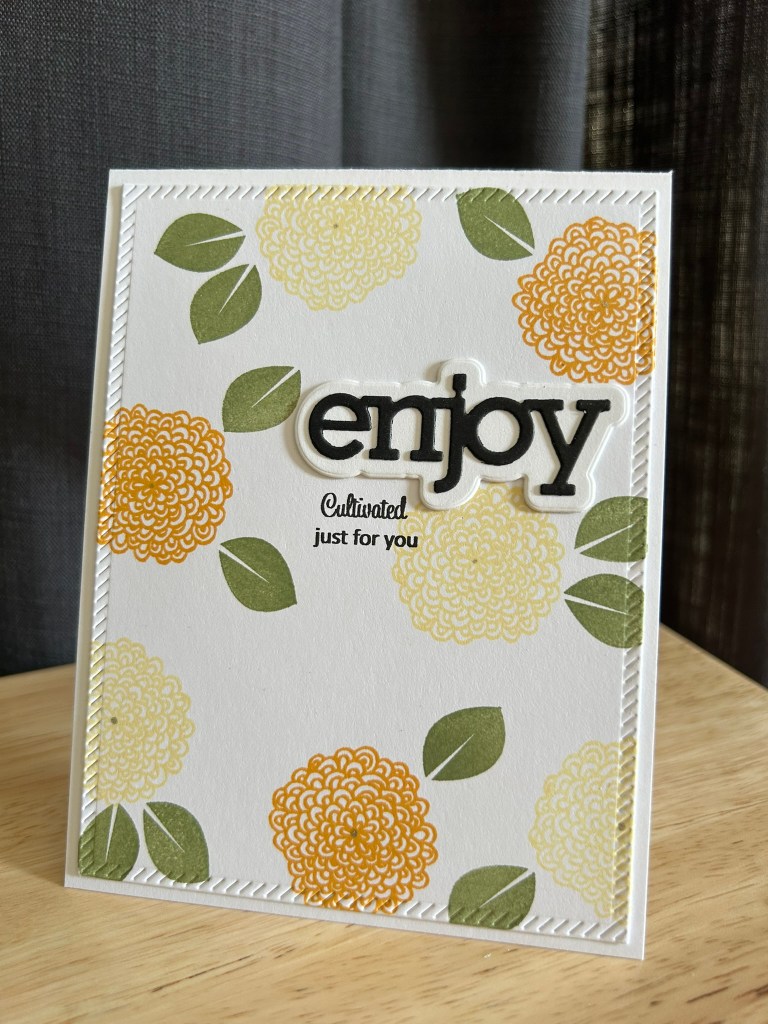
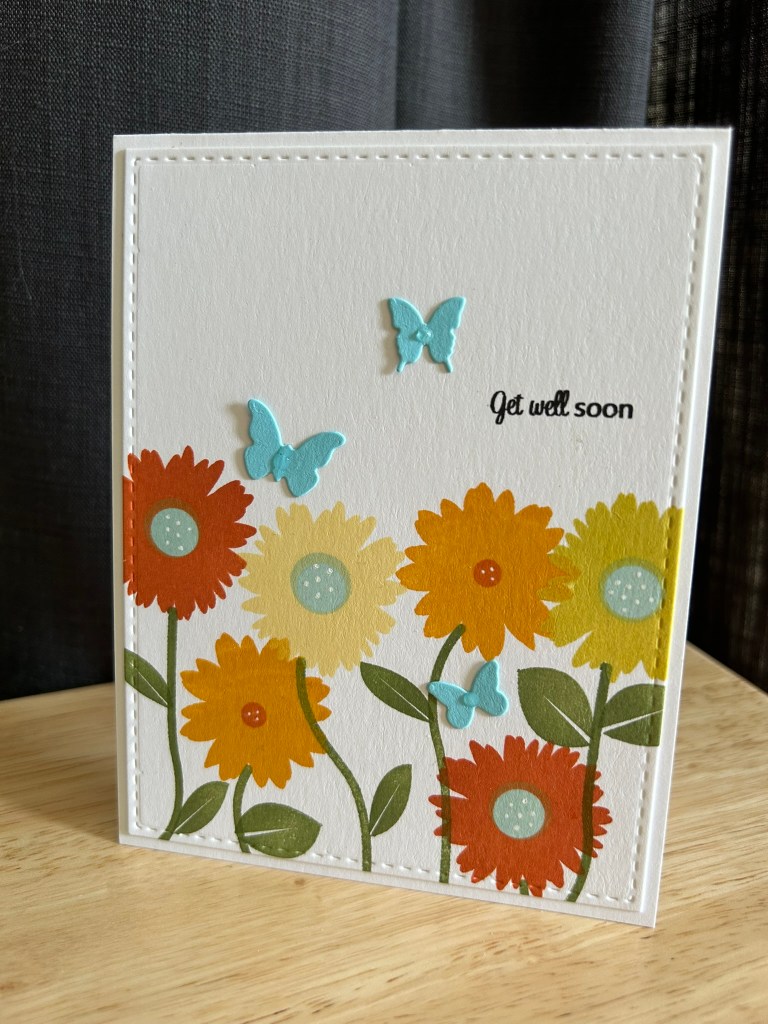
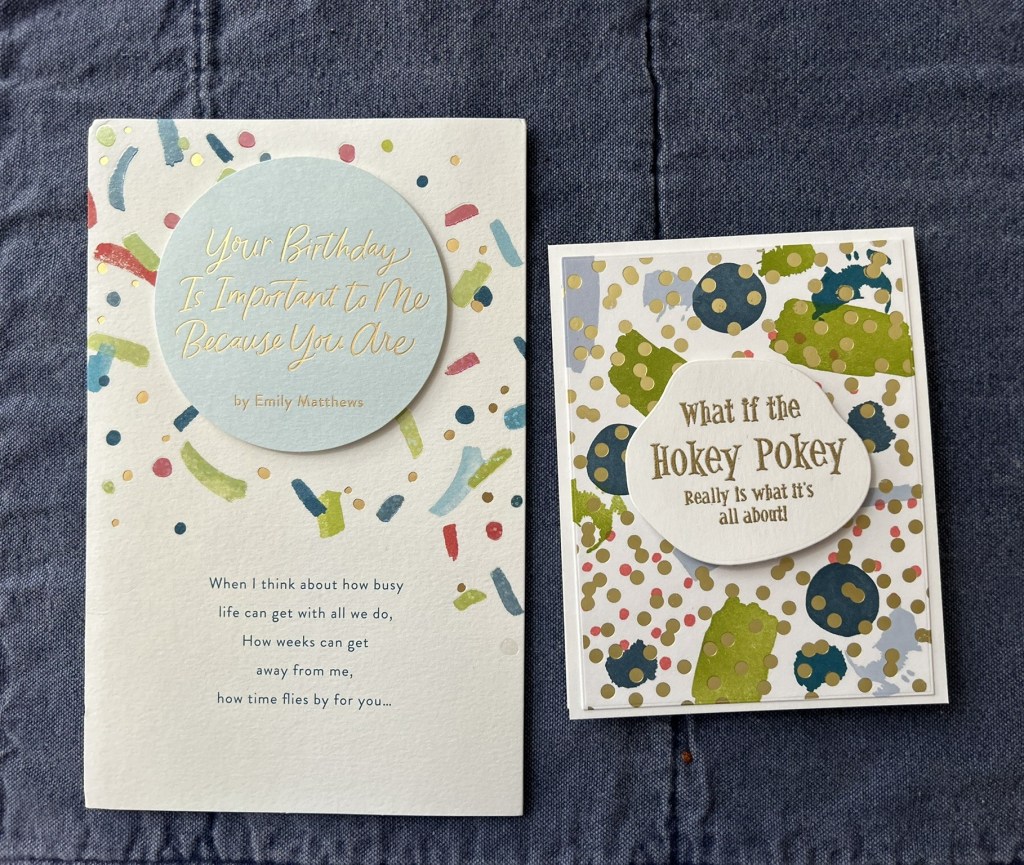
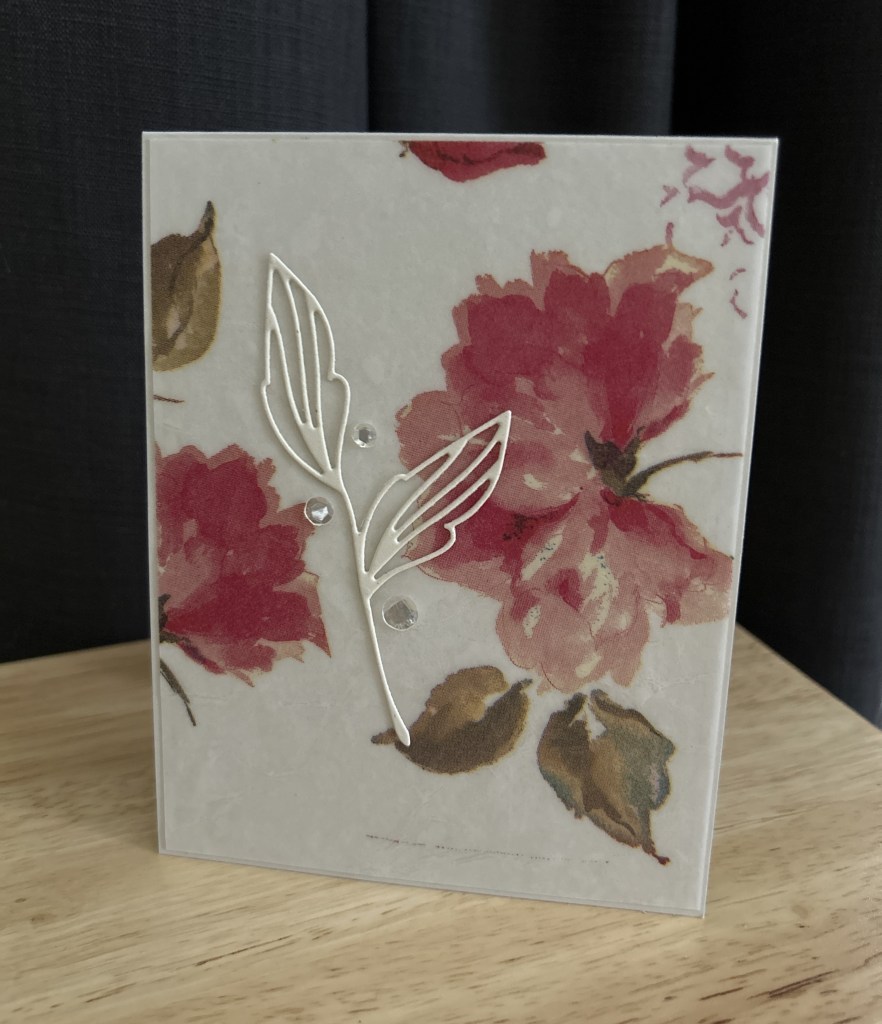
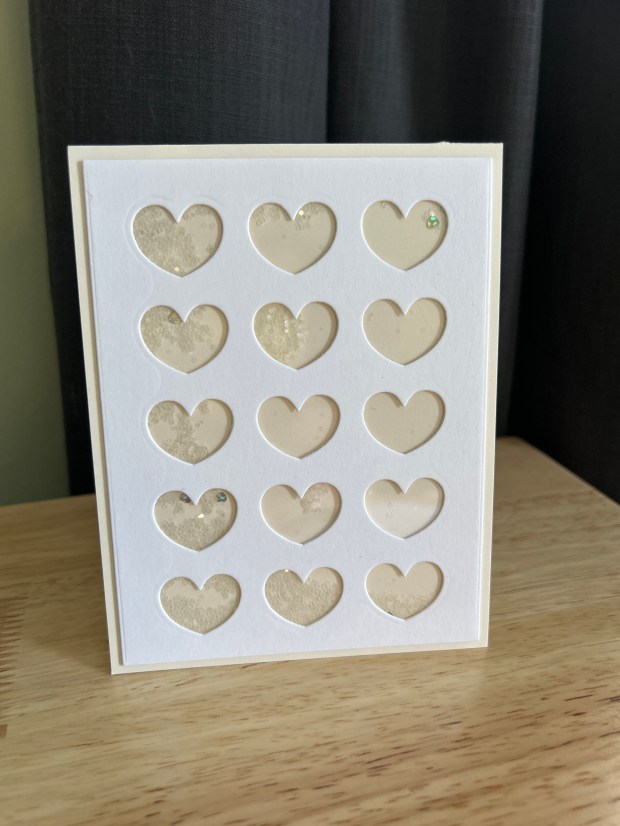
For the third card, I returned to a repeating pattern, but with a softer palette and simpler composition.

Using peach tones with olive leaves created a vintage textile feel.

This card felt like a bridge between the original style of the set and the simpler designs I tend to gravitate toward now.

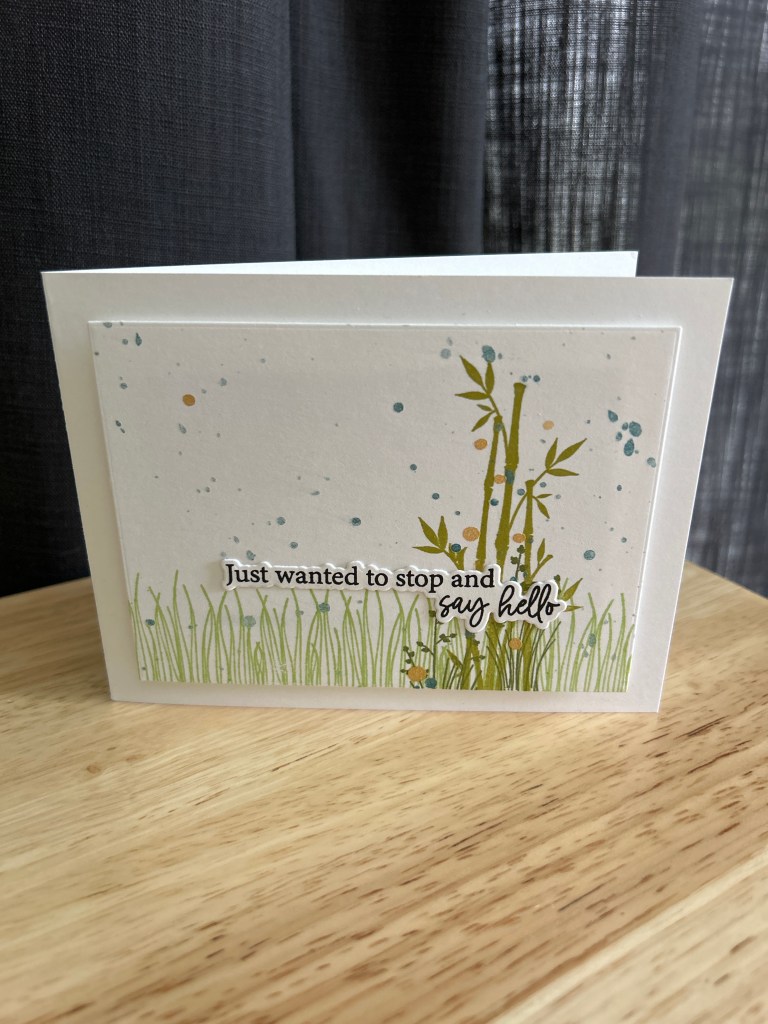
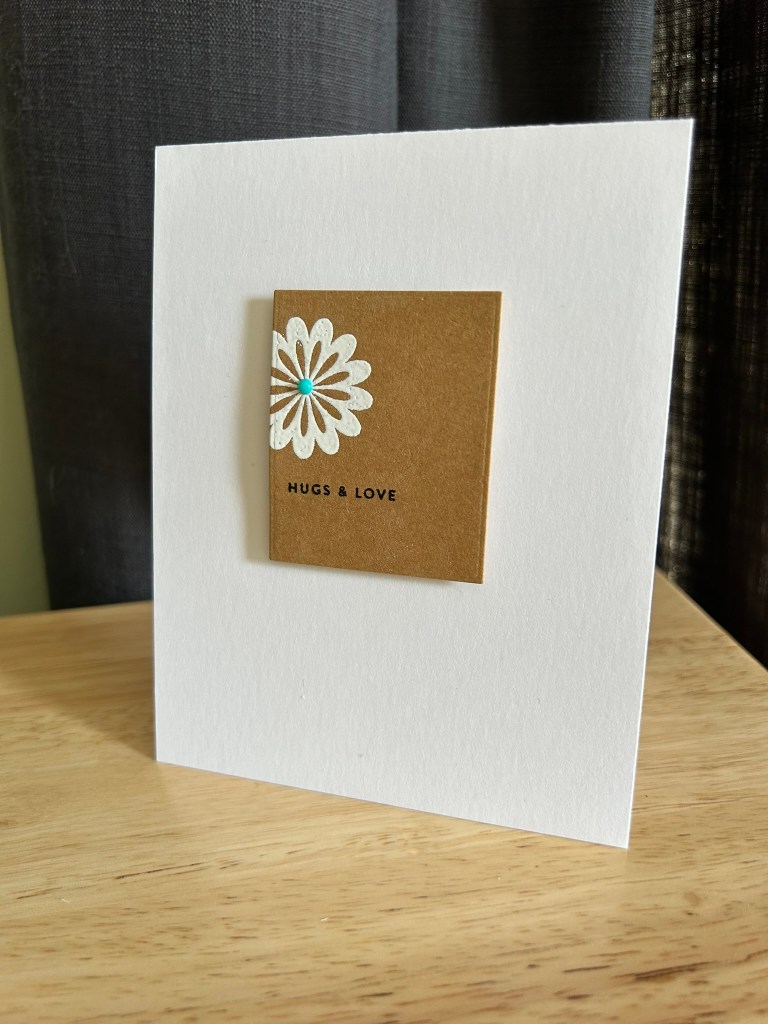
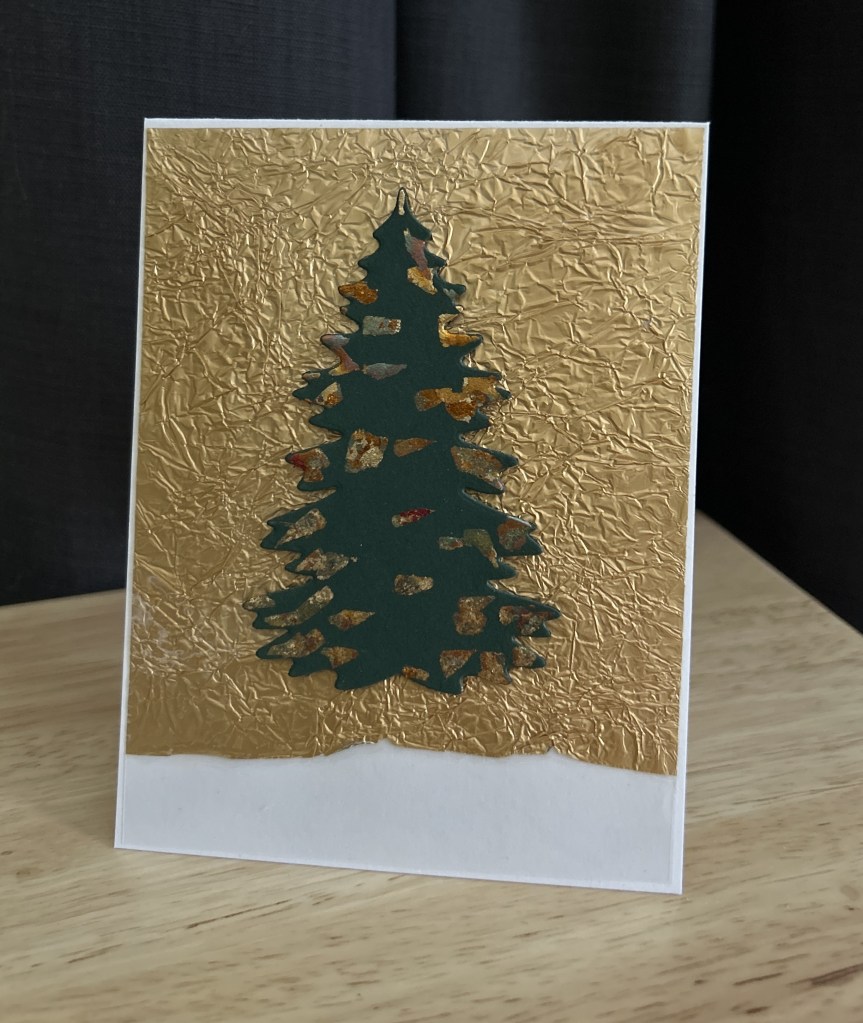
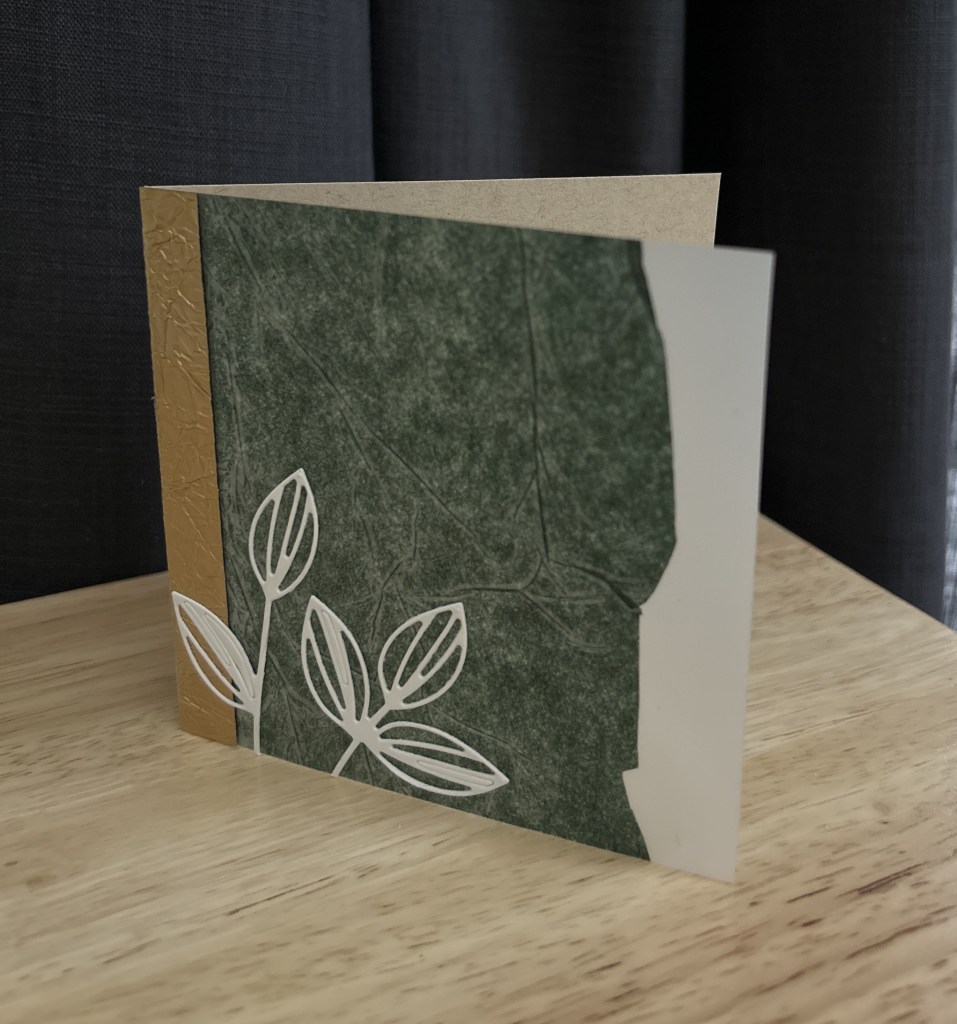
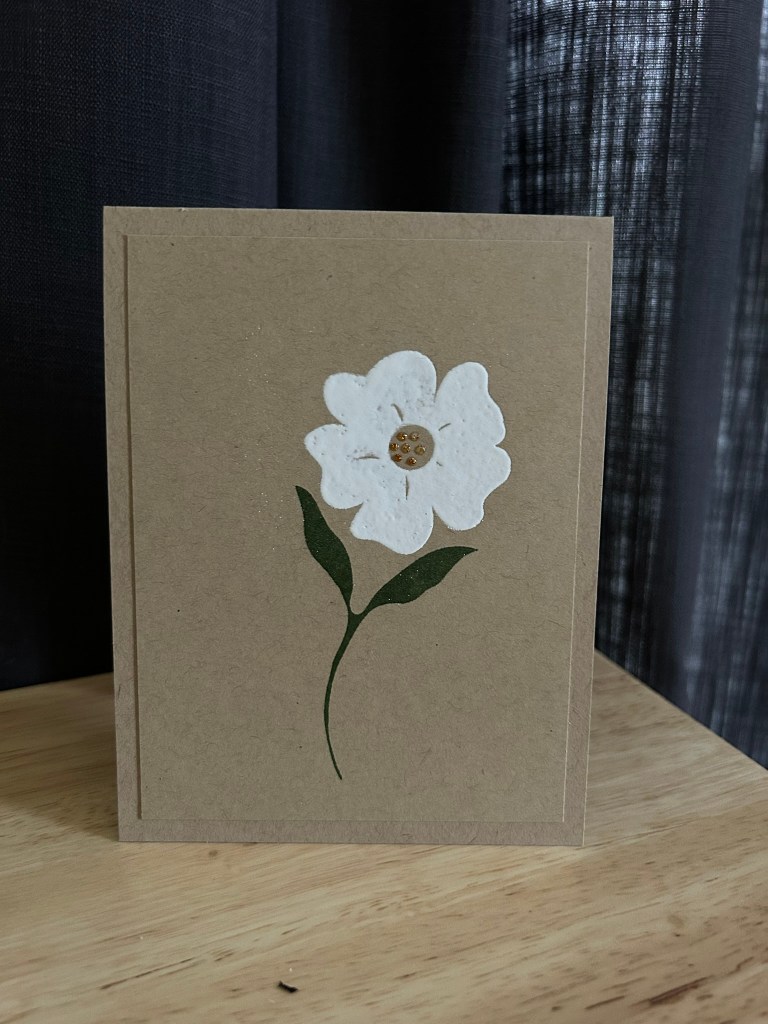
The final card is the quietest of the group.

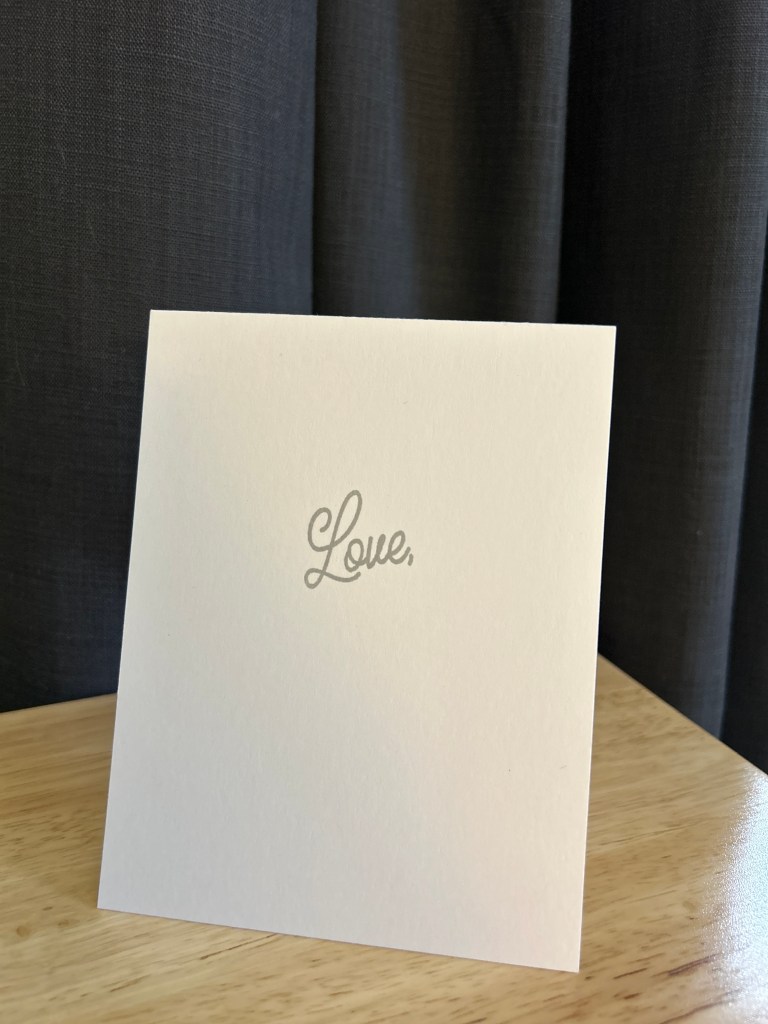
A single white flower heat embossed (twice) on kraft cardstock, paired with deep green leaves and tiny gold glittery drops in the center, lets the design stand on its own. I chose to leave the front sentiment-free so the flower could remain the focal point.

In fact, a friend saw the card sitting on my desk and immediately picked it out to send. That’s usually a good sign that a design is working.

Final Thoughts

Working with Flower Garden again reminded me that good design is simply good design.

The stamps themselves didn’t change. What changed was how I approached them.

When I first bought this set years ago, I probably felt like I needed to use every element and fill the entire card front with pattern. That was the style I saw in the original samples, and it’s easy to assume that’s the way a set is meant to be used.

But revisiting the set showed me something different.

The same images can create bold graphic patterns, soft calico-style florals, modern minimal designs, or a single simple botanical. Once I stopped trying to use the set the way I originally saw it, it revealed far more flexibility than I had given it credit for.

Sometimes an older stamp set doesn’t need to be replaced. It just needs to be seen again with fresh eyes.


Another Revisit: Peaceful Garden

In my effort to use what I have, I have been revisiting older stamp sets and look at it again with fresh eyes. Sometimes my style has changed, sometimes I see new possibilities in the images, and sometimes it simply reminds me why I kept the set in the first place.

This week I revisited Papertrey Ink’s Peaceful Garden, an older botanical set that includes bamboo, grasses, and a few sentiments. Instead of trying to recreate ways I have used it in the past, I experimented a bit and ended up making three very different cards.

For the first card I stamped the bamboo along the right side of the panel and added a simple grassy foreground. To give the scene some energy, I splattered blue and gold ink across the panel. I am currently obsessed with Tim Holtz Distress Spritz!

The splatter softens the bamboo and adds a light shimmer. I finished the card with a sentiment from a Honeybee Stamps set that happened to be on my desk.

For the second card I returned to the grass stamp and was dreaming of spring. I added a simple bunny silhouette and a row of tiny layered flowers to suggest spring in miniature.

This one is more playful than the first card. The yellow card base adds warmth and the little flowers give the scene some dimension without overwhelming the simplicity of the design.

For the final card I wanted to try something quieter. I heat embossed the bamboo in white on soft gray cardstock and paired it with a masked “peace” sentiment from the set.

The white embossing gives the bamboo a soft, almost carved look against the gray background. Leaving plenty of open space keeps the card calm and minimal, which felt like the right direction for this image.

Revisiting older supplies like this is always a good reminder that sometimes a stamp set doesn’t need anything new—just a slightly different approach. It was fun to see how three very different cards could come from the same set. Already looking around for what set to pick next!

Supplies

  • Papertrey Ink: Peaceful Garden
  • Honey Bee Stamps: Inside Kindness sentiments
  • Impression Obsession: Rabbit Set
  • Poppystamps: Wildflower Patch
  • Impression Obsession: Tiny Flowers
  • Impression Obsession: Tiny 6 Petal Flowers
  • Tim Holtz Distress Spritz

Plot Twist: This Set Is Actually Modern

The Papertrey Ink Garden of Life set has been sitting in my stash for years.

I am fairly certain I bought it secondhand. Probably Facebook. Maybe eBay. Five years ago? That sounds about right.

I remember trying to use it once. I made something, did not quite know where to go with it, and quietly put it away.

Today, I pulled it back out.

I had been watching a YouTube video by Prairie Paper & Ink, and she was watercoloring florals from a new Simon Says Stamp set and her colors were inspriring. That sent me digging through my own stash to see if I had anything with some similar shapes.

It was that mum in Garden of Life that caught my eye. The first card leaned into pattern and layering. I let the flowers fill the space and added a bold die cut sentiment. It felt cheerful and generous.

Once I started looking more closely at the set, I went down a little rabbit hole and found an old video of Nicole Heady from Papertrey Ink. She had stamped one of the florals on fabric and sewn it into a bag. Seeing it used that way shifted something for me. It reminded me that this set was designed thoughtfully.

From there, the cards began to evolve.

I focused on the fuller florals and created a more joyful get well card with layered blooms and butterflies. Same set. Completely different mood. At some point I consulted Chat GPT regarding what color to use on the flower centers to help it feel more spring like- the answer aqua. Brilliant.

Then I tried something completely different.

I stamped the graphic outline flowers in black on white and left a lot of breathing room. One small aqua center dot became the only pop of color. Suddenly the set felt modern. Crisp. Intentional.

That little aqua accent started to show up again and again. It became the thread tying the cards together.

Next, I played with white embossing on kraft using one of the more open graphic flowers. Cropped into a smaller square and mounted on a white base, it felt like a tiny art print. Clean. Graphic. Contemporary.

I used to think this set felt a little old fashioned.
Now I see that it was simply waiting for me to catch up.

The stamps were always well designed. They stood the test of time.

What evolved was my eye — my sense of balance, my comfort with restraint, my willingness to let white space do the work.

Sometimes rediscovery isn’t about the supply.
It’s about the maker.

Casing a Watercolor Birthday Card (and Making It Your Own)

Sometimes inspiration arrives in the mail.

I received a birthday card from my aunt this year that immediately caught my eye. It featured a joyful watercolor background filled with playful brushstrokes in mustard, teal, navy, and red. The color story felt energetic but cohesive, and I knew I wanted to explore that palette in my own way.

Rather than copying the card directly, I treated it as a starting point and asked: What do I love most about this? The answer was clear — the bold, painterly shapes and the modern color combination.

Building the Background

To recreate that abstract watercolor feel, I pulled out:

  • Papertrey Ink – Watercolor Wonder
  • Concord & 9th – Playful Patterns

I combined larger brushstroke images with smaller dots and organic shapes, working in layers. The key was keeping the color palette tight: mustard yellow, deep teal, navy, and a warm red/coral.

Instead of trying to “balance” every mark, I let the shapes overlap naturally. The background is busy, but the white space allows it to breathe.

Choosing the Sentiment

With a bold background, the sentiment needed to be strong enough to stand up to it.

I used the Sizzix Tim Holtz Thinlits Bold Text (665847) die set and cut “HAPPY BIRTHDAY TO YOU” directly from the finished panel. Rather than layering a sentiment on top, I wanted the words to become part of the design.

Behind the cut panel, I added a layer of matte gold cardstock to carry the cold foil from the original card. Originally, I tested mirror gold. It was fun and flashy, but it overpowered the painterly background. The matte gold, however, softened the look and felt more integrated. It added richness without competing with the watercolor texture.

Inlaying the small inner letter pieces kept the design sleek and flush, which helps maintain a clean, modern feel.

Casing a card doesn’t mean recreating it exactly. It means identifying what speaks to you and translating that element through your own supplies and style.

This project reminded me how powerful a strong color palette can be — and how a small material choice, like switching from mirror to matte gold, can completely change the final look.

I had so much fun, I kept going!

Being Inspired!

I sat down at my craft desk this Saturday morning feeling a little… untethered. You know that feeling — you want to make something, but nothing in particular is calling your name. The desk is cluttered, and every option feels both possible and overwhelming.

So I opened Stash Summit and watched Terese Calvin’s session.

Almost immediately, I felt that familiar spark of inspiration. Watching her work through a simple stenciling technique was exactly what I needed. It gave me a starting point instead of a blank slate.

I pulled out my previously unused Pinkfresh Studio Dainty Plaid stencils and decided to follow her general approach — soft layers, a light hand, and letting the background do the work. From there, I reached for a small set of oldies-but-goodies Memory Box floral dies I had just picked up on sale — one of those little happy purchases waiting for the right moment.

This process genuinely brightened my day. Huge thanks to the Stash Summit team, and to Terese in particular, for the inspiration and the gentle reminder that sometimes all it takes is a place to begin.

Supplies Used
Pinkfresh Studio – Dainty Plaid Stencils
Distress Oxide Inks (soft spring tones)
Memory Box Floral Dies
Concord & 9th Enamel Dots
Simon Says Stamp – Tiny Words Birthday (sentiments)

Nine Daisies

We all have design ideas we return to again and again. For me, the grid is one of them.

I love how a grid works on a card. It’s orderly without being rigid, calm without being boring, and it gives every element a moment to shine. When I’m unsure where to start, a grid almost always gets me there.

This card was inspired by a The Stamp Market floral grid I saw on Instagram. I loved the simplicity of the repeated flowers and the way the design felt both sweet and modern. Using that as a jumping-off point, I put my own spin on it with products I already had in my stash from The Stamp Market.

One of the things I’m trying to be more mindful of is using what I already own. The flowers on this card come from The Stamp Market Easter Egg Shaker Die, which I originally bought specifically for this daisy. It wasn’t sitting out on my desk, but it was there waiting in my stash, and this felt like the perfect moment to bring it back out.

Rather than filling the panel completely, I chose nine daisies arranged in a 3×3 grid. That small decision made the card feel more intentional and a little more grown-up, which felt right for the scale of the flowers. I did cut a quarter inch off the bottom of the card to keep the spacing. I also added just a few leaves to gently break the repetition. I was briefly stuck on the top row until I shared a photo to Chat GPT and got the suggestion to use only one leaf there. Sometimes the smallest change makes all the difference.

The flowers are popped up slightly for dimension, but that’s where I stopped. No bling. No front sentiment. I wanted the flowers to do all the talking. This is one of those cards that came together quietly and confidently, and it’s honestly one of the sweetest cards I’ve ever made.

Thanks to the original Instagram post for the inspiration. I love how seeing someone else’s work can spark something new, especially when it encourages me to look back through my own supplies and see them with fresh eyes.

Supplies Used

  • Cardstock: Neenah Solar White 110 lb
  • Ink:
    • Papertrey Ink Fresh Peony
    • The Stamp Market Golden (flower centers)
    • The Stamp Market green paper (I believe it’s Cactus)
  • Dies:
    • The Stamp Market Easter Egg Shaker Die (flower and leaf pieces)

Some supplies were pulled from my stash. Exact ink and paper shades may vary.


The Laminated Series: Gifts, Remembered

This little run of cards felt like it needed to be made.

I pulled out the laminator to laminate a document, and while I had it out, I decided to laminate a piece of florist paper I’d been saving. That one small experiment led to another, and soon I was looking through the house for more papers worth preserving.

Each piece ultimately began as part of a gift, something already wrapped with intention before I ever touched it. As I worked, I found myself asking a simple question: what if the wrapping becomes the keepsake I could gift forward?

Card One: Gold from a Pear

The gold foil background on the first card comes from the wrapping on a pear my dad sent me because he thought I needed more Vitamin C as I had been sick. It was one of those unexpected gifts that arrives without fanfare and somehow means more for it.

I laminated the gold to preserve the crinkle and light-catching texture. I then die-cut a simple evergreen silhouette from deep green cardstock and used some gold gilding flakes (I was inspired by a holiday card someone had sent us!). The gold peeks through the tree like light caught in branches, irregular and organic. No embellishments, no sentiment on the front. The material carries the meaning.

Card Two: Florals from a Gift Shop Bouquet

The second card uses a floral paper from a gift shop bouquet my partner gave me, soft pinks and muted greens printed on thin tissue. Laminated, the paper gains just enough weight to stand on its own without losing its delicacy.

I kept this one minimal: a winter white Stamp Market botanical die-cut placed slightly off-center, with a few clear embellishments scattered like dew. I’m not sure I nailed the combo of the die cut with the paper, but I still like it. And I got to use this die cut that I got on sale a few years which has sat patiently in my stash waiting for me to notice it!

Card Three: Green from a Friend

The final card uses green tissue paper from a present given by a dear friend. The paper had a subtle, mottled texture that really came alive once laminated. I let that surface be the star.

A white botanical die-cut anchors the lower corner, with a narrow strip of gold at the edge as a quiet nod back to the other cards in the series. I originally had this as an A2 card and I had replaced the card cover front with this laminated panel instead, but it ended about an inch short of the panel. After looking at it for a day or two, I decided what it really wanted to be was a square card so the panel lined up. It’s probably my favorite, though I always say that about the last card I finish.

Hot Tip: Laminating Delicate Pieces

When laminating smaller or irregular pieces, I learned the hard way that they need a little help going through the machine. I now tuck a narrow strip of cardstock along the leading edge inside the laminating pouch. That extra bit of structure keeps everything feeding straight and prevents the pouch from getting pulled in or crunched.

Ask me how I know. Twice. Including one memorable moment that involved taking the laminator apart to rescue a stuck pouch.

A small scrap of cardstock is much easier to deal with than a dismantled machine.

Why Laminate?

Laminating these papers did more than protect them. It gave them permission to be used.

So many gift papers feel “too special” to cut into. Lamination changes that relationship. Once laminated, these fragile, found papers could actually enter my card-making practice instead of hovering on the sidelines, saved but unused. The lamination stabilized them, gave them structure, and made them workable alongside cardstock and dies.

This isn’t about perfection or symmetry. It’s about honoring where the paper came from while letting it move forward into something new. These pieces still carry their original stories, but now they’re doing some work.

This series is also a quiet exercise in using what I already have. Not pristine supplies, not newly purchased materials, but found objects that passed briefly through my hands and could easily have been discarded. Laminating them allowed me to extend their life and purpose in a way that fits how I actually make cards.

It’s a reminder that creativity doesn’t always begin with a blank sheet. Sometimes it begins with paying attention to what’s already there.

And sometimes, the wrapping really is the gift.

Heart Cover Dies- 4 Ways

The Cards…

White-on-White, Popped for Dimension

The first card is all about light and shadow.

A white heart cover panel, popped up on a white card base, creates dimension without adding color or embellishment. The hearts become texture rather than theme, and the raised panel gives just enough depth to keep the design feeling intentional and finished.

This is often where I start when revisiting an older die. Before adding anything, I like to see what it does on its own.

A Subtle Heart Flat Shaker

For the next card, I leaned into movement.

By backing a heart cover panel with acetate and adding a small amount of confetti, the design becomes interactive without becoming busy. Keeping the palette soft allows the shaker to feel like a surprise rather than the main event.

This reminded me that shaker cards don’t have to be loud to be joyful.

A Minimal Row of Hearts

This card using a row of hearts rather than a full panel.

A soft gray layer behind the hearts adds contrast while keeping the overall look calm and restrained.

This ended up being one of my favorites. It’s a reminder that you don’t always need to use an entire cover die to get a strong design.

Turning the Card Inside Out


This card was the turning point for me.

Instead of using a heart cover die on the front of the card, I moved it to the inside and let the exterior stay almost completely bare. Just a single, softly stamped Love on the front, nothing else.

Opening the card becomes part of the experience. The texture and pattern are there, but they’re revealed quietly, only after you interact with the card. It changes the pacing. The outside is calm and restrained, while the inside carries the visual weight.

I love how this approach rethinks what a “feature” has to be. The cover die isn’t hidden, it’s simply waiting. And the card feels more intimate because of it, like something meant to be discovered rather than announced.

Final Thoughts

Even though these cards use four different heart cover dies, the process was the same for all of them: slow down, look closely, and let the supplies I already own guide the design.

Revisiting older tools like this helps me make more intentional choices and keeps my creative practice grounded in curiosity rather than accumulation. There’s often more range in a single category of supply than we remember.

If you have a cover die that hasn’t seen much use lately, this is your invitation to pull it out and see what else it might have to offer. My next step is to do something with all the hearts I have saved from cutting out these cover dies!

Supplies

  • Assorted heart cover dies from my stash (including Hero Arts Heart Confetti Cover Die)
  • Neenah Classic White (card bases and panels)
  • Papertrey Ink Soft Stone Cardstock
  • Clear acetate (for shaker cards)
  • Confetti
  • Foam adhesive strips from Amazon
  • Gray ink (Catherine Pooler Pebble)
  • Hero Arts Heart Confetti Cover Die
    • Used for the inside-of-the-card reveal and white-on-white texture.
  • Trinity Stamps Row of Hearts Dies
    • Used for the minimalist linear heart designs on the front panels.
  • Poppystamps Confetti Hearts Panel
    • Smaller, scattered heart pattern for a soft white-on-white look.
  • Simon Says Stamp Chunky Hearts Panel

Rescuing the Unchosen Card

One of my favorite creative rituals isn’t starting something new.
It’s going back.

I give away almost all of the cards I make. I’m known for my kraft box of cards. When seasons change, like now as I put away Christmas and holiday cards, I go through what was left from the last cycle. They’re finished, technically, but no one picked them. And that tells me something important: the card isn’t bad, it’s just unresolved.

I pull those cards out and put them in a pile, saving them to revisit in a different light when I have a moment.

This card lived in that pile for a while.

The original problem

The original version had all the right ingredients:

  • a cheerful yellow sunburst
  • a simple “hi”
  • a little sparkle

But everything was polite. Centered. Careful. The colors were pleasant, the design was tidy, and yet nothing invited the eye to linger. It was the kind of card you don’t dislike, but also don’t reach for.

And that’s usually the clue.

The first change: commitment

Instead of trying to tweak the card in place, I made a more decisive move and cut the entire focal element into a circle. Looking at it more critically, I realized the stitched panel was fighting with the fantastic sunburst die cut.

That single change gave the design a sense of confidence. Of course, it also meant die cutting through four layers of paper, which ultimately resulted in me carefully separating the top layers that did cut from the card base that very much did not.

But the result was worth it. The sunburst stopped behaving like a background detail and started acting like a focal point.

Sometimes a card doesn’t need more.
It needs a clearer decision.

The second change: contrast

Next, I mounted the circle on a soft blue card base. This was the turning point. I was very consciously channeling a sky.

The warm yellow finally had something to push against, and the sparkle in the center suddenly felt intentional instead of decorative. The card shifted from neutral to expressive simply by letting warm and cool colors do their natural work.

The final change: air

The finishing touch was a thin vellum shadow behind the circle, with two smaller circle die cuts layered underneath to create a little space between the vellum and the card base.

That quiet layer made all the difference. It added separation without weight, softness without distraction. No extra embellishments, no added noise. Just a little breathing room so the focal element could sit comfortably on the card front.

This was the moment the card felt finished.

A note about the inside

The original card had “brighter days ahead” stamped on the inside.

It wasn’t wrong, but it felt a bit like making a promise I couldn’t fully keep. I’ve realized I don’t love sentiments that tell someone else how to feel or what’s coming next. It’s the same reason I shy away from cards that say “smile.” I don’t want to instruct or predict on someone else’s behalf.

What I can do is offer something that’s within my control.

So I’m redoing the inside sentiment as “sending sunshine.” It’s more personal and more active, and it mirrors exactly what the front is doing visually. It’s not a directive or a forecast, just a small offering.

Sometimes the fix isn’t just structural.
Sometimes it’s tonal.

Why I love doing this

Redoing unchosen cards teaches me more than starting from scratch:

  • I learn why something didn’t work
  • I practice restraint instead of accumulation
  • I use what I already have

It’s low-stakes, deeply satisfying, and surprisingly instructive. Often the card doesn’t need to be remade. It just needs to be listened to.

This one is finally ready to go back in circulation.
And the orphan pile just got a little smaller.


Supplies

  • Die: Memory Box Circle Burst
  • Sentiment: The Stamp Market “hi” word die (now discontinued)
  • Center circle: Yellow glitter cardstock (brand unknown, from stash)
  • Cardstock:
    • Yellow cardstock for the burst (Papertrey Ink or similar weight)
    • Soft blue card base (likely Spellbinders, exact color unknown)
  • Vellum: Heavyweight vellum from stash
  • Adhesives: Standard tape runner and liquid glue

Merry and Bright and All Things Light

Sometimes I make a holiday card with a particular person in mind. This one is for two friends who do important work in a counseling and advocacy setting that supports queer and trans folx and their families. What they offer is care, acceptance, and a place where people can show up as themselves. In their honor, I wanted to make a queer Christmas card that still felt seasonal.

I reached into my stash of pre-cut rainbow arcs from The Stamp Market Little Rainbow Die. They are leftovers from other projects, all in soft sherbet shades, and the palette came together almost on its own. It is not a traditional rainbow, but it felt right for this card, a little gentle and a little hopeful.

For the sentiment, I stamped Merry and Bright from Simon Says Stamp Simple Holiday Greetings in a clear, bright red. I tried adding a small heart embellishment, but it pushed the design in a direction that did not fit the intention. Instead, I added a light touch of Wink of Stella on the red arc. It gives just a hint of shimmer when the card moves in the light.

Inside I stamped Love and Joy. That felt like the message I wanted to send to them this season.

I love this card.